How to Convert Your 2014 to 2017 Infiniti Q50 Front Bumper to the Sport Model
Converting your 2014 to 2017 Infiniti Q50 to look like a 2016 to 2017 Q50 Sport Model is one of the easiest to do.
Here's what you'll need to make the conversion:
Custom painted 2016 to 2017 Infiniti Q50 front bumper
Fog light bezels
Lower grille
Screws
Tow hook cover
10mm socket wrench
Flat-head screwdriver
These parts are included in the conversion kit available here at ReveMoto, except for the wrench and screwdriver. We have also listed the instructions here to help you with the conversion!
1. Start off at the bottom of the Infiniti Q50. You’ll see about eight bolts that need to be removed using a 10 mm socket wrench.
2. Turn the wheel to expose the bolts on the side of the bumper.
3. Using a flat head screwdriver, pry the bolts on the fender liner.
4. Using a 10-millimeter socket wrench, remove the bolt that can be found where the bumper and fender meet. Repeat all of the above steps on the other side.
5. On the top side of the hood, push back the cover to take off the bolt.
6. Remove the engine cover by removing the push pins.
7. Remove the bumper. Start on the sides, pull up, and remove carefully.
8. Disconnect the fog lights from the bumper.
9. Remove the clips at the bottom of the bumper using a flat-head screwdriver.
10. Take off the bracket on top of the bumper.
11. Remove the bolts using a 10-millimeter socket.
12. Remove the daytime running light. Using a 10-millimeter socket wrench, remove the screws at the top of the light.
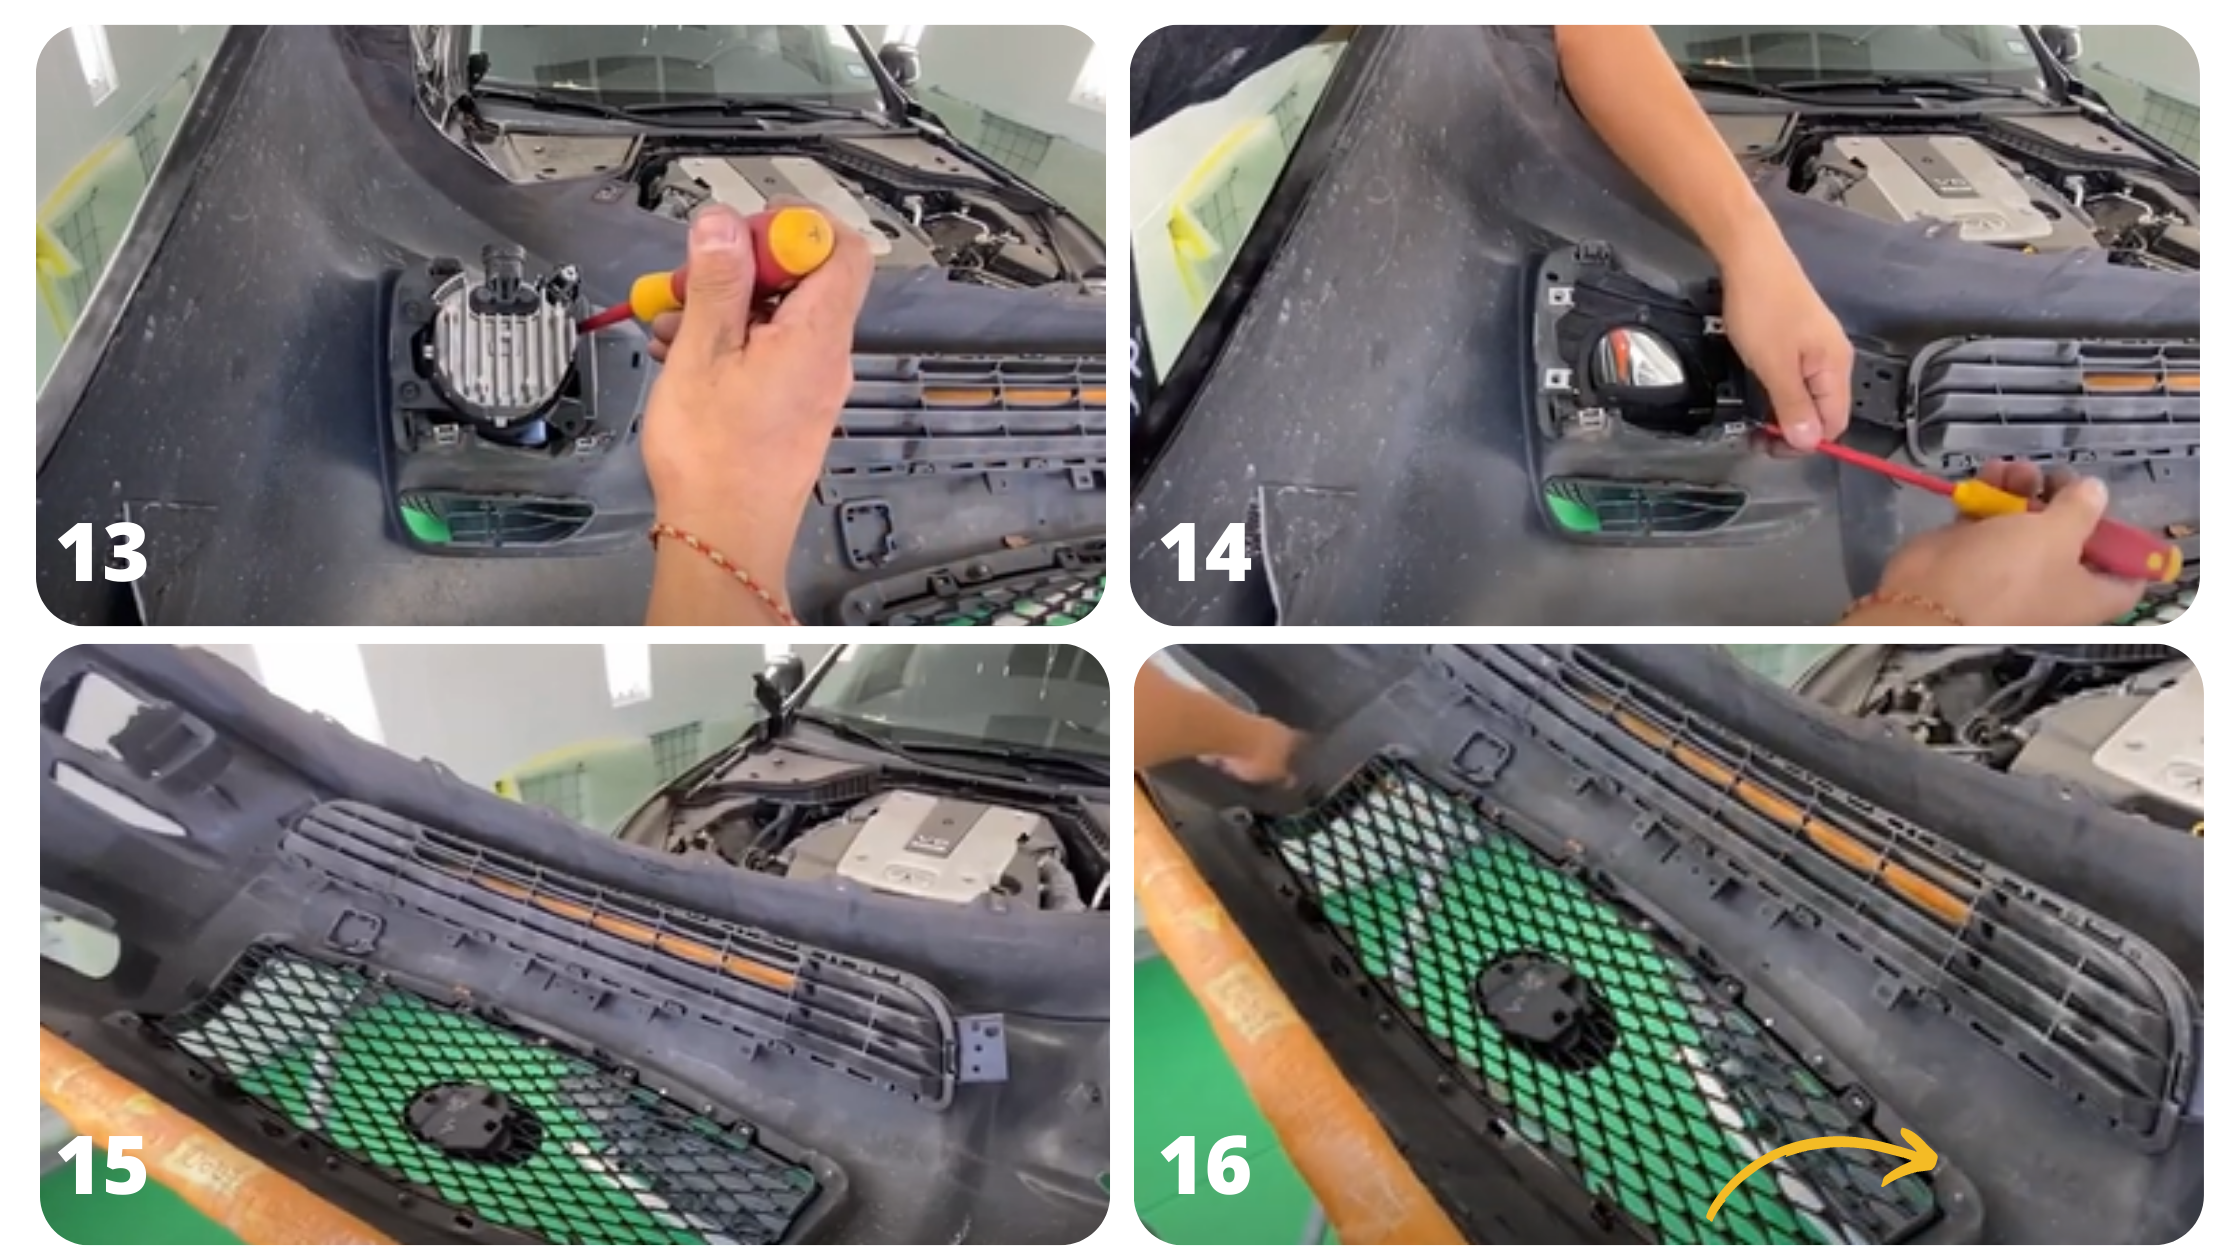
13. Using a screwdriver, take off the remaining screws to remove the fog light.
14. With a screwdriver, remove the clips from the base where the fog lights were removed.
15. Remove the fog light covers.
16. Using a 10-millimeter socket wrench, remove the eight nuts that are around the upper grille.
17. Remove the two tabs at the bottom and four tabs at the top of the grille.
18. Take off the rubber piece at the bottom of the bumper called the weatherstrip or bumper seal. This is easy to take off by pulling it off. If it’s a little hard, use a blade.
19. Install the bezels on the new bumper.
20. Make sure the holes line up and put in the clips.
21. Put in the fog lights. To be sure that you’re putting the fog light on the correct side, make sure that everything lines up.
22. Put the clips on the sides of the fog lights.
23. Install the daytime running lights.
24. Put in the screws to secure the fog light.
25. Next step is to install the lower grille. Make sure that the prongs line up with the holes on the grille.
26. Install the upper grille. Same with the lower grille, make sure that the holes line up properly. Push the grille until it locks.
27. Put the screws on to secure the upper grille. Do not overtighten.
28. Stick the weatherstrip at the bottom of the bumper using a double sided tape.
29. Install the top bumper bracket. Line the prongs to match the holes on the bumper. Snap it into place.
30. Secure it with 10 mm bolts.
31. Put the clips on the lower part of the bumper.
32. It’s time to install the bumper. Note that the bar at the bottom front of the Q50 should be in between the lower end of the bumper and the grille when installed.
33. Install the top bumper brackets removed on step 5.
34. Install the bolt in between where the front bumper and fender meet, which you removed on step 4.
35. Put back the engine cover.
36. Put back the lower engine cover at the bottom of the vehicle.
37. Install the emblem.
38. Install the hitch cover.
There you have it! Need more guidance? Watch our video below for reference.
DISCLAIMER: While ReveMoto tries to make the information in this blog as accurate as possible, we make no claims, promises, or guarantees about the accuracy, completeness, or applicability of the content. No information contained in this blog shall create any expressed or implied warranty or guarantee of any particular result. All do-it-yourself (DIY) projects entail some risk. It is the sole responsibility of the viewer to assume this risk. ReveMoto is not responsible or liable for any loss, damage (including, but not limited to, actual, consequential, or punitive), liability, claim, or any other injury or cause related to or resulting from any information posted in this blog.


